Reflective Insulation for Pole Barns
InfraStop® Insulation- Reflective Both Sides
Installation Instructions:
New Construction:
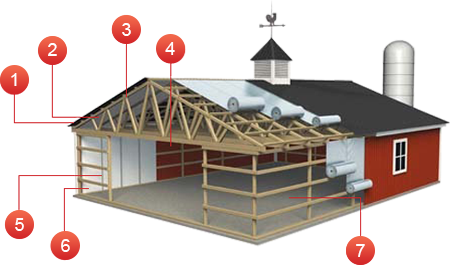
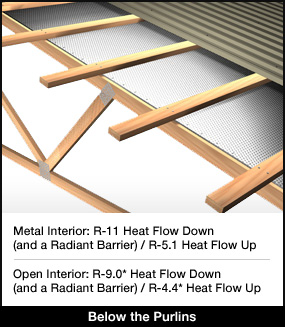
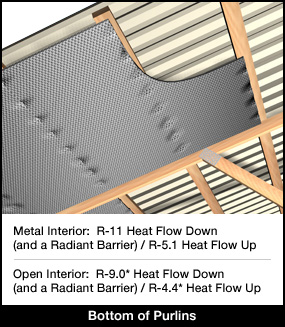
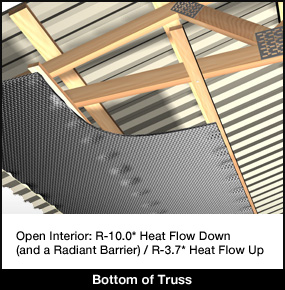
Roof – Below the Purlin: After the trusses are set, run two purlins to make sure the trusses stay true. Attach the product to the first truss with at least 5/16” staples. T emporarily nail a 2” x 4” block over the end of the product to prevent it from pulling away. Roll out the product across the top of the trusses, pull tight and staple. Run subsequent courses of the product with the ¾” staple tabs overlapping at the seams. Tape the seams with InfraStop® foil tape. Install purlins over the insulation. Nail or screw to the trusses through the product.
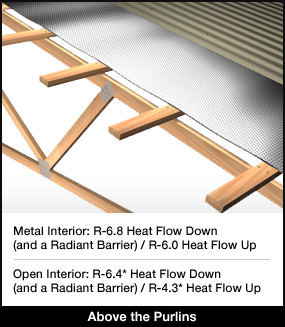
Roof – Above the Purlin: Per the instructions above, except install product after installing the purlins (Insure a drape of ¾” in middle of the cavity is present).
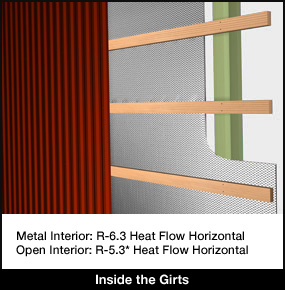
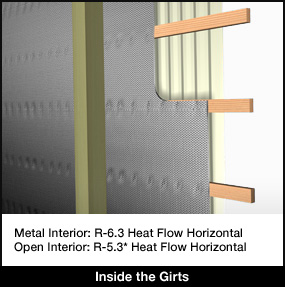
Wall – Inside the Girts: Staple the product to the outside of the top girt. Staple the product to the inside of the remaining girts. Tape the seams with InfraStop® foil tape.
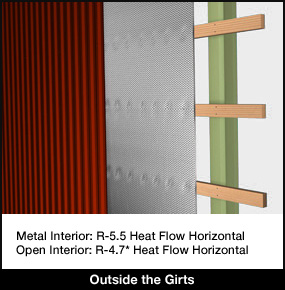
Wall – Outside the Girts: Staple the product to the outside of the top girt. Staple the product to the outside of the remaining girts.Insure there is a drape of at least ¾” (towards the interior of the building) at the center of each cavity.Tape the seams with InfraStop® foil tape.
Retrofit:
Roof – Below the Purlin: Nail 1” x 2” furring strips on the bottom of and perpendicular to the trusses on 22” centers. Butt the furring strips together, tape and staple to keep them together if required. Staple the edges of the product to the furring strips with ¾” tabs. Tape the seams with InfraStop® foil tape. Tape any butt seams with InfraStop® foil tape, insure taped seam has a good full continuous bond. Staple the product at approximately 4” intervals down the middle of the sheet into the furring strip above.
Wall: The product can be installed either vertically or horizontally. Attach the product to the inside of the girts using 5/16” staples. Tape the seams with InfraStop® foil tape. Staple the product at approximately 4” intervals into the girt.
Note: The installation instructions are the same for both reflective insulations. The only difference is that the Reflective One Side (white) product is installed with the White Poly Side towards the interior of the building.
R-Values and Air Spaces: Please take note as you review the featured applications, all building assemblies include an air space on one or both sides of the insulation (always on the reflective side of the “Reflective One Side” or White / Poly product. These air spaces are required to provide the state R-values and must be included in the finished structure.

